Rods for the magnet

Hello everyone,

I have a question about building the magnet.

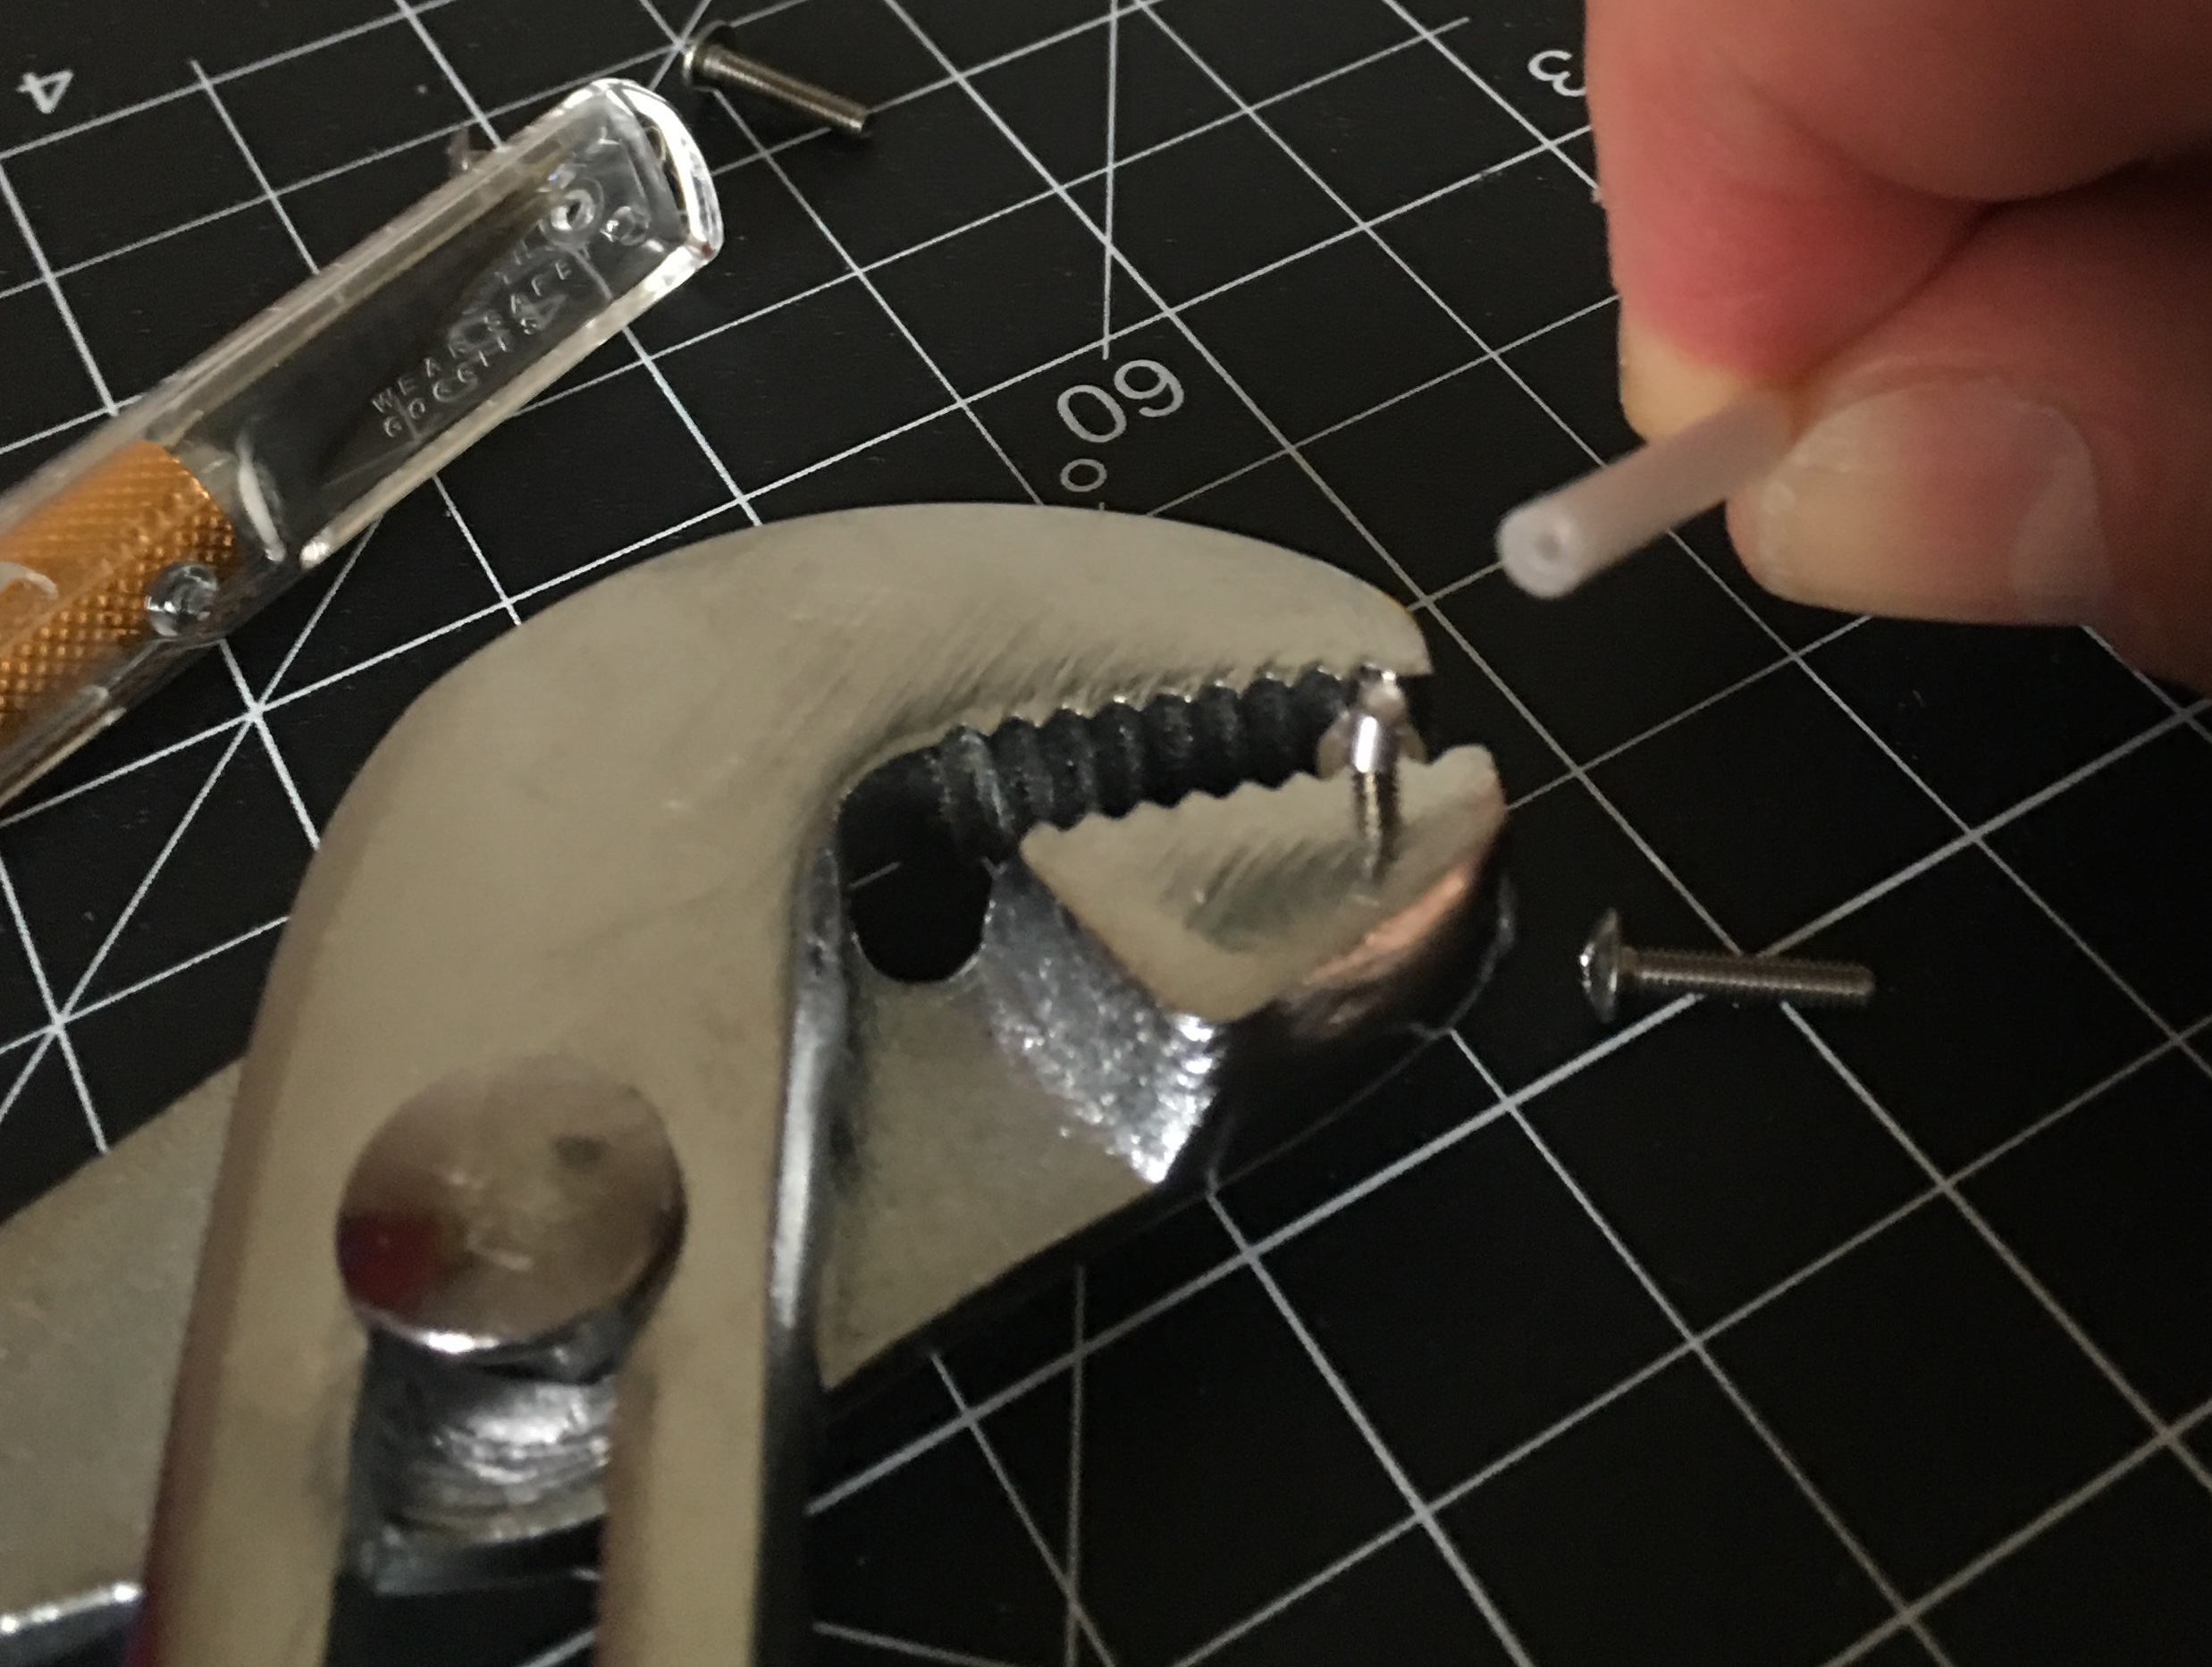
I assembled the neoprene rubber parts as described, but when it came to the following steps I got stuck.

To my understanding, this item:

would have been used as the rod connecting the parts of the magnet, with these screws

going in at each side to the portion of the tube used as a rod.

The screws are not thread cutting, how do I proceed to the next step? Am I completely off?

Any help would be greatly appreciated!

Thanks!

Massi

Hey sorry for the confusion! At one point we did try using thread-cutting screws to make it easier to get them in the plastic rods. Probably left a mention of it in the instructions somewhere…but we realized it doesn’t really matter that the screws are thread cutting — it should work fine with those screws, just screwing them straight into the rods.

Yes be prepared for a bit of frustration doing this step. Getting the screws to go in straight felt like an exercise in futility, but I did get it eventually. By the last rod I’d sort of become an expert at it :grin:!

Thanks so much for your suggestions! I might post some pictures tonight to confirm I got this right. The other night I spent 20 minutes trying to screw the screws into the rod unsuccessfully, just want to make sure I’m doing it right!

The way I did it was to use one hand to clamp down on one end of the rod with a pair of pliars to keep it from turning. Then I used the pointer finger of my other hand to hold the screw steady as I screwed it in. If that makes sense. Once I got the hang of it, it only took a minute or two to screw it in. Then of course the rod becomes threaded by the screw so that you can take the screw out and put it back in with ease if you need to.

1 Like

Thanks a lot! Just to make sure I got it right, those are what the screws look like and this is the nylon rod I’m trying to put the screws in.
Is that right? Thanks!

Sure looks right to me! Usually what helps for me is to clamp the rod pretty tightly (with pliers) close to the end you’re screwing in, like maybe a half inch from the end. Takes some effort to get it in so will test your grip strength, hard to do them all at once :slight_smile:

Then once you have the screw in on one side, and assemble the rest of the components so you just have to finish with the screw on the other side, you can use a second screwdriver to provide opposing tension. For that last part, it can be tricky getting the alignment just right; if it doesn’t catch you may have to jiggle things around a bit and try again til the screw starts to go in straight.